


| Flap Size | Flap Dimension | Rough Cut Out | Outside Frame Dimension | Recommended Pet Height |
|---|---|---|---|---|
| Small | 6" w x 12" h | 9-1/4" w x 15-1/8" h | 10 1/8" w x 16 3/4" h | 9" - 17" |
| Medium | 8" w x 16" h | 11-5/16" w x 19-3/16" h | 12 1/8" w x 20 13/16" h | 9" - 23" |
| Large | 10" w x 20" h | 13-3/8" w x 23-3/16" h | 14 3/16" w x 24 13/16" h | 9" - 29" |
| XL | 12" w x 24" h | 15-1/2" w x 27-3/16" h | 16 1/4" w x 28 7/8" h | 9" - 37" |
| XXL | 14" w x 28" h | 17-1/2" w x 31-1/4" h | 18-1/4" w x 32-7/8" h | 9" - 42" |
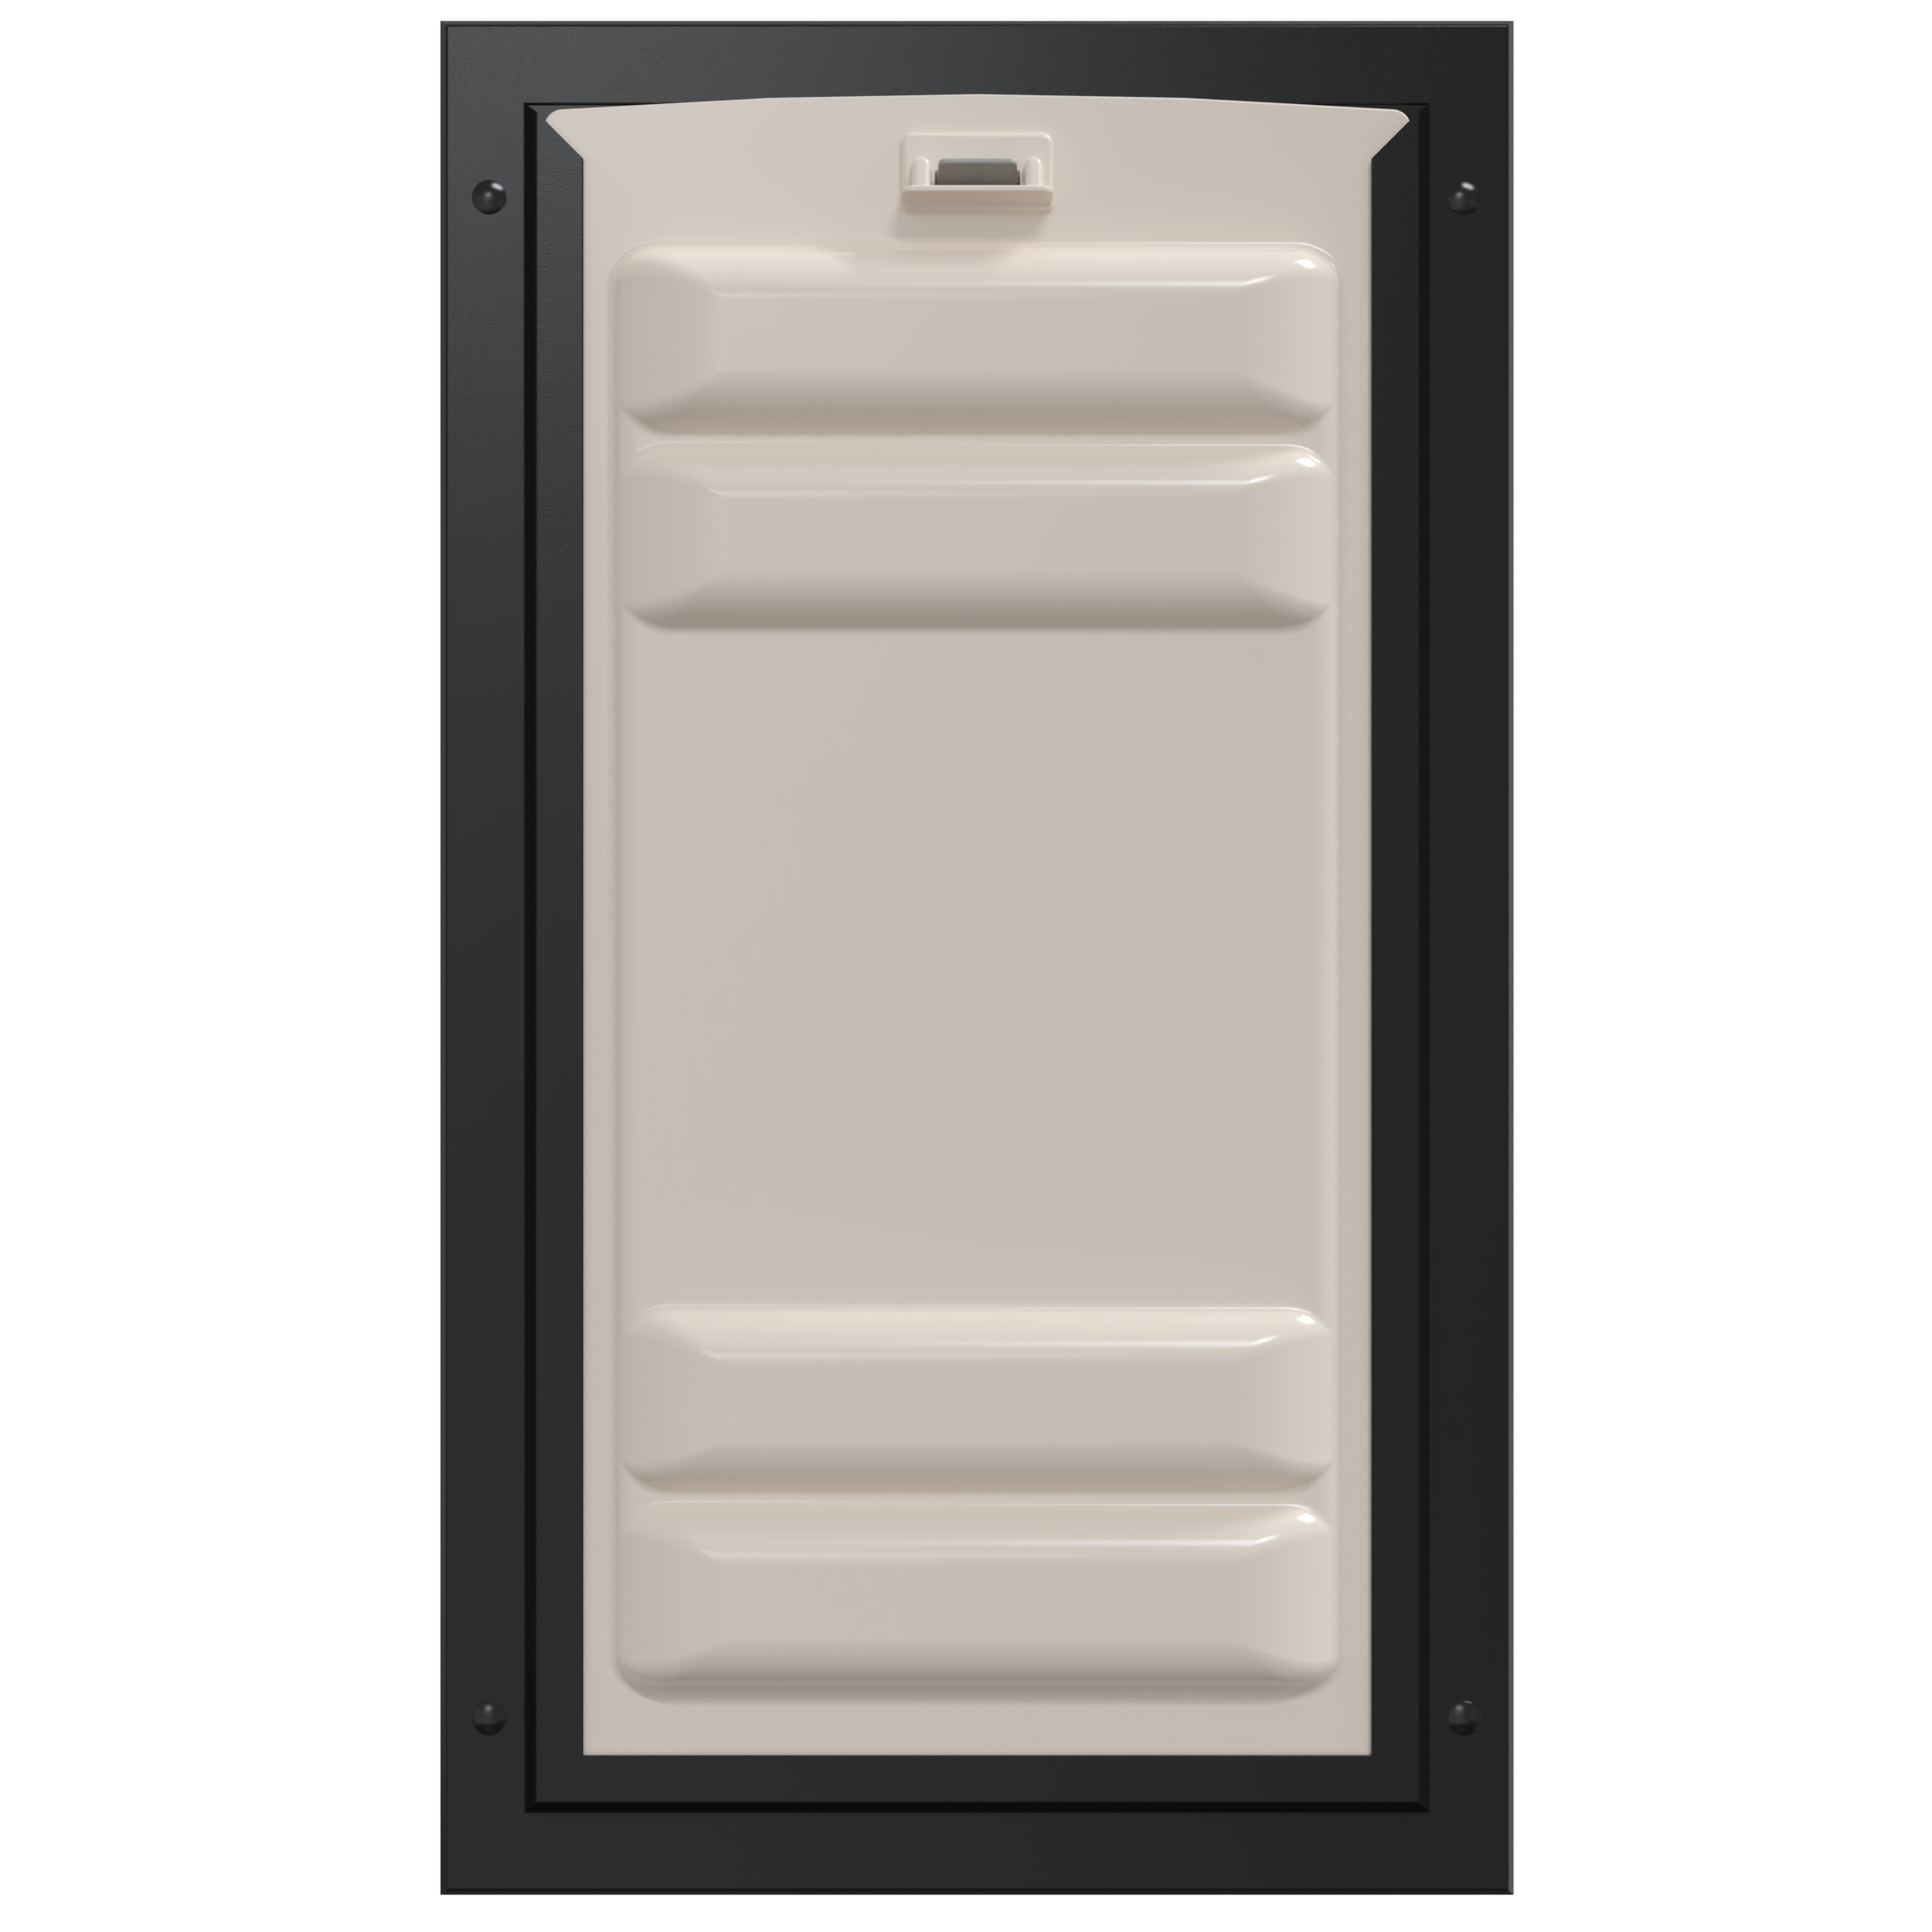
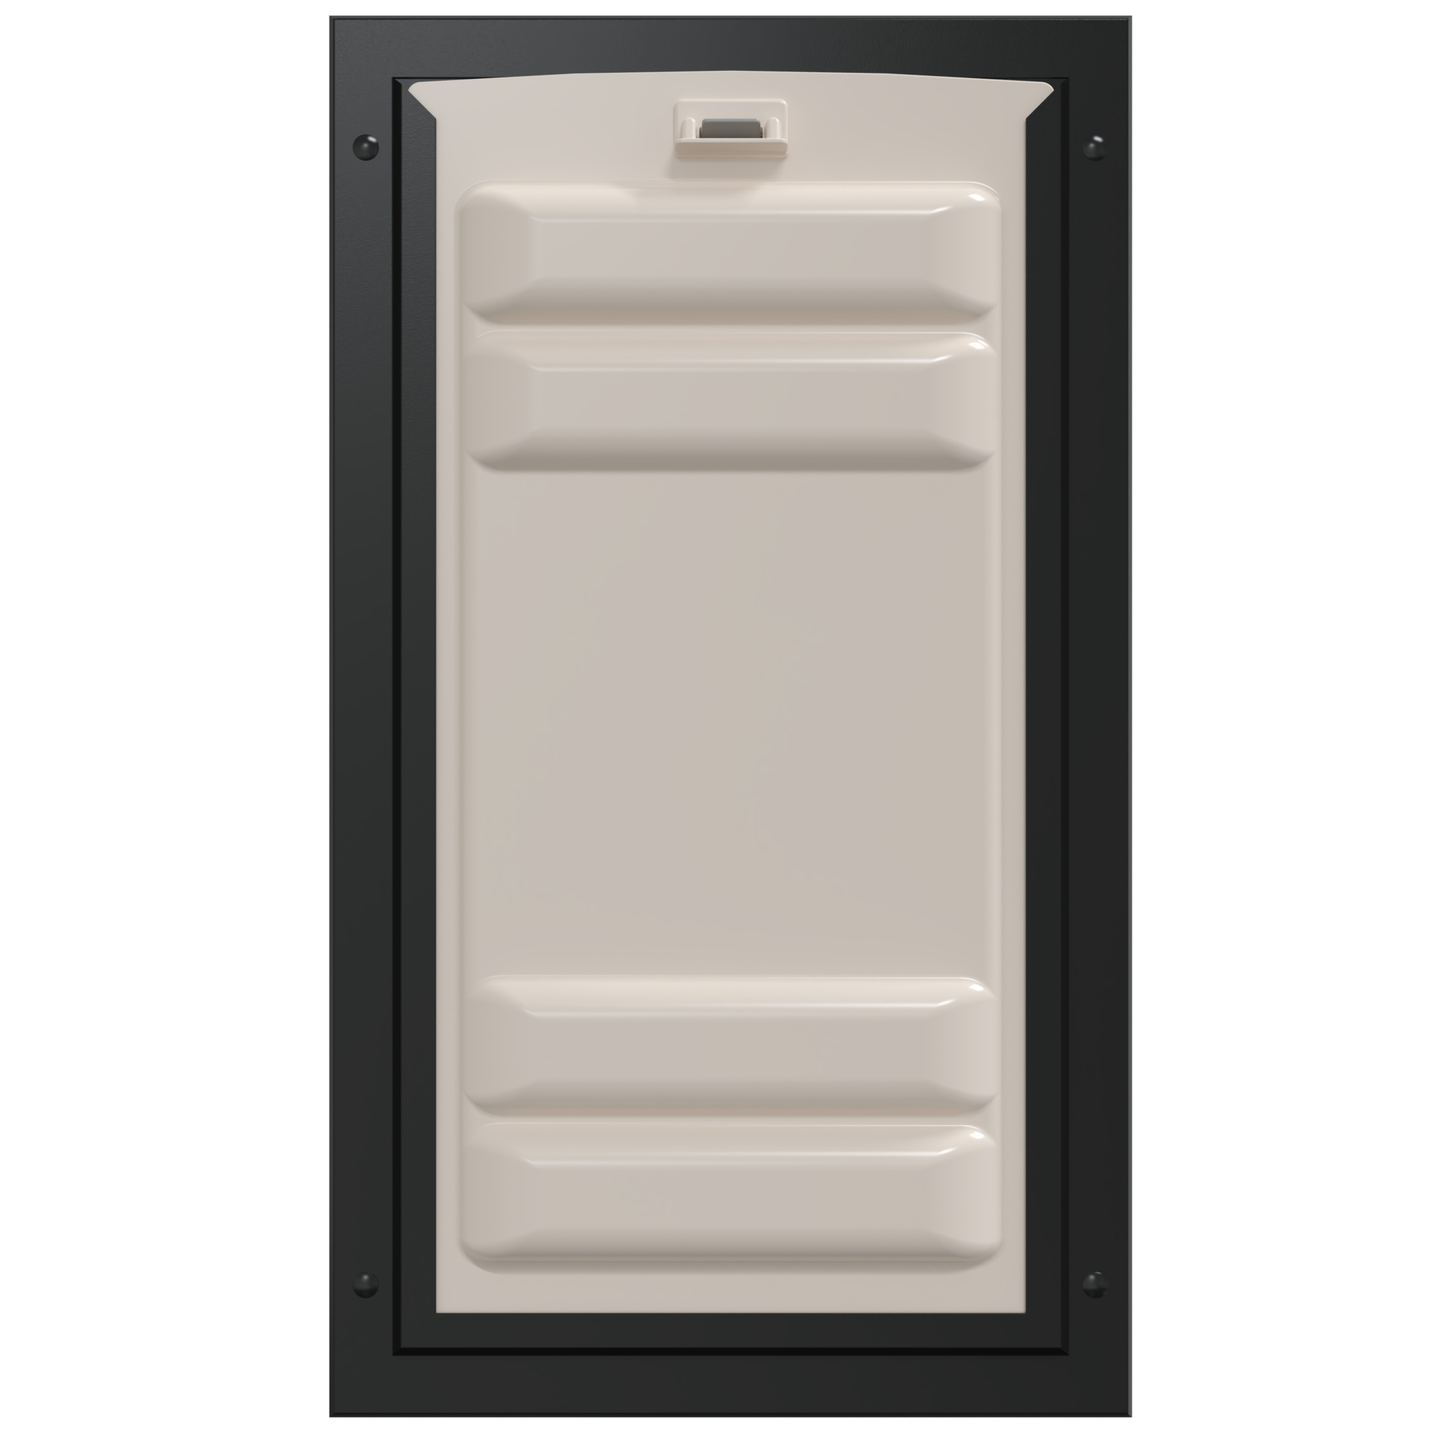
Liberty Pet Door For Doors
Regular price
$239.99 USD
Regular price
Sale price
$239.99 USD
Unit price
per


 Product Details
Product Details
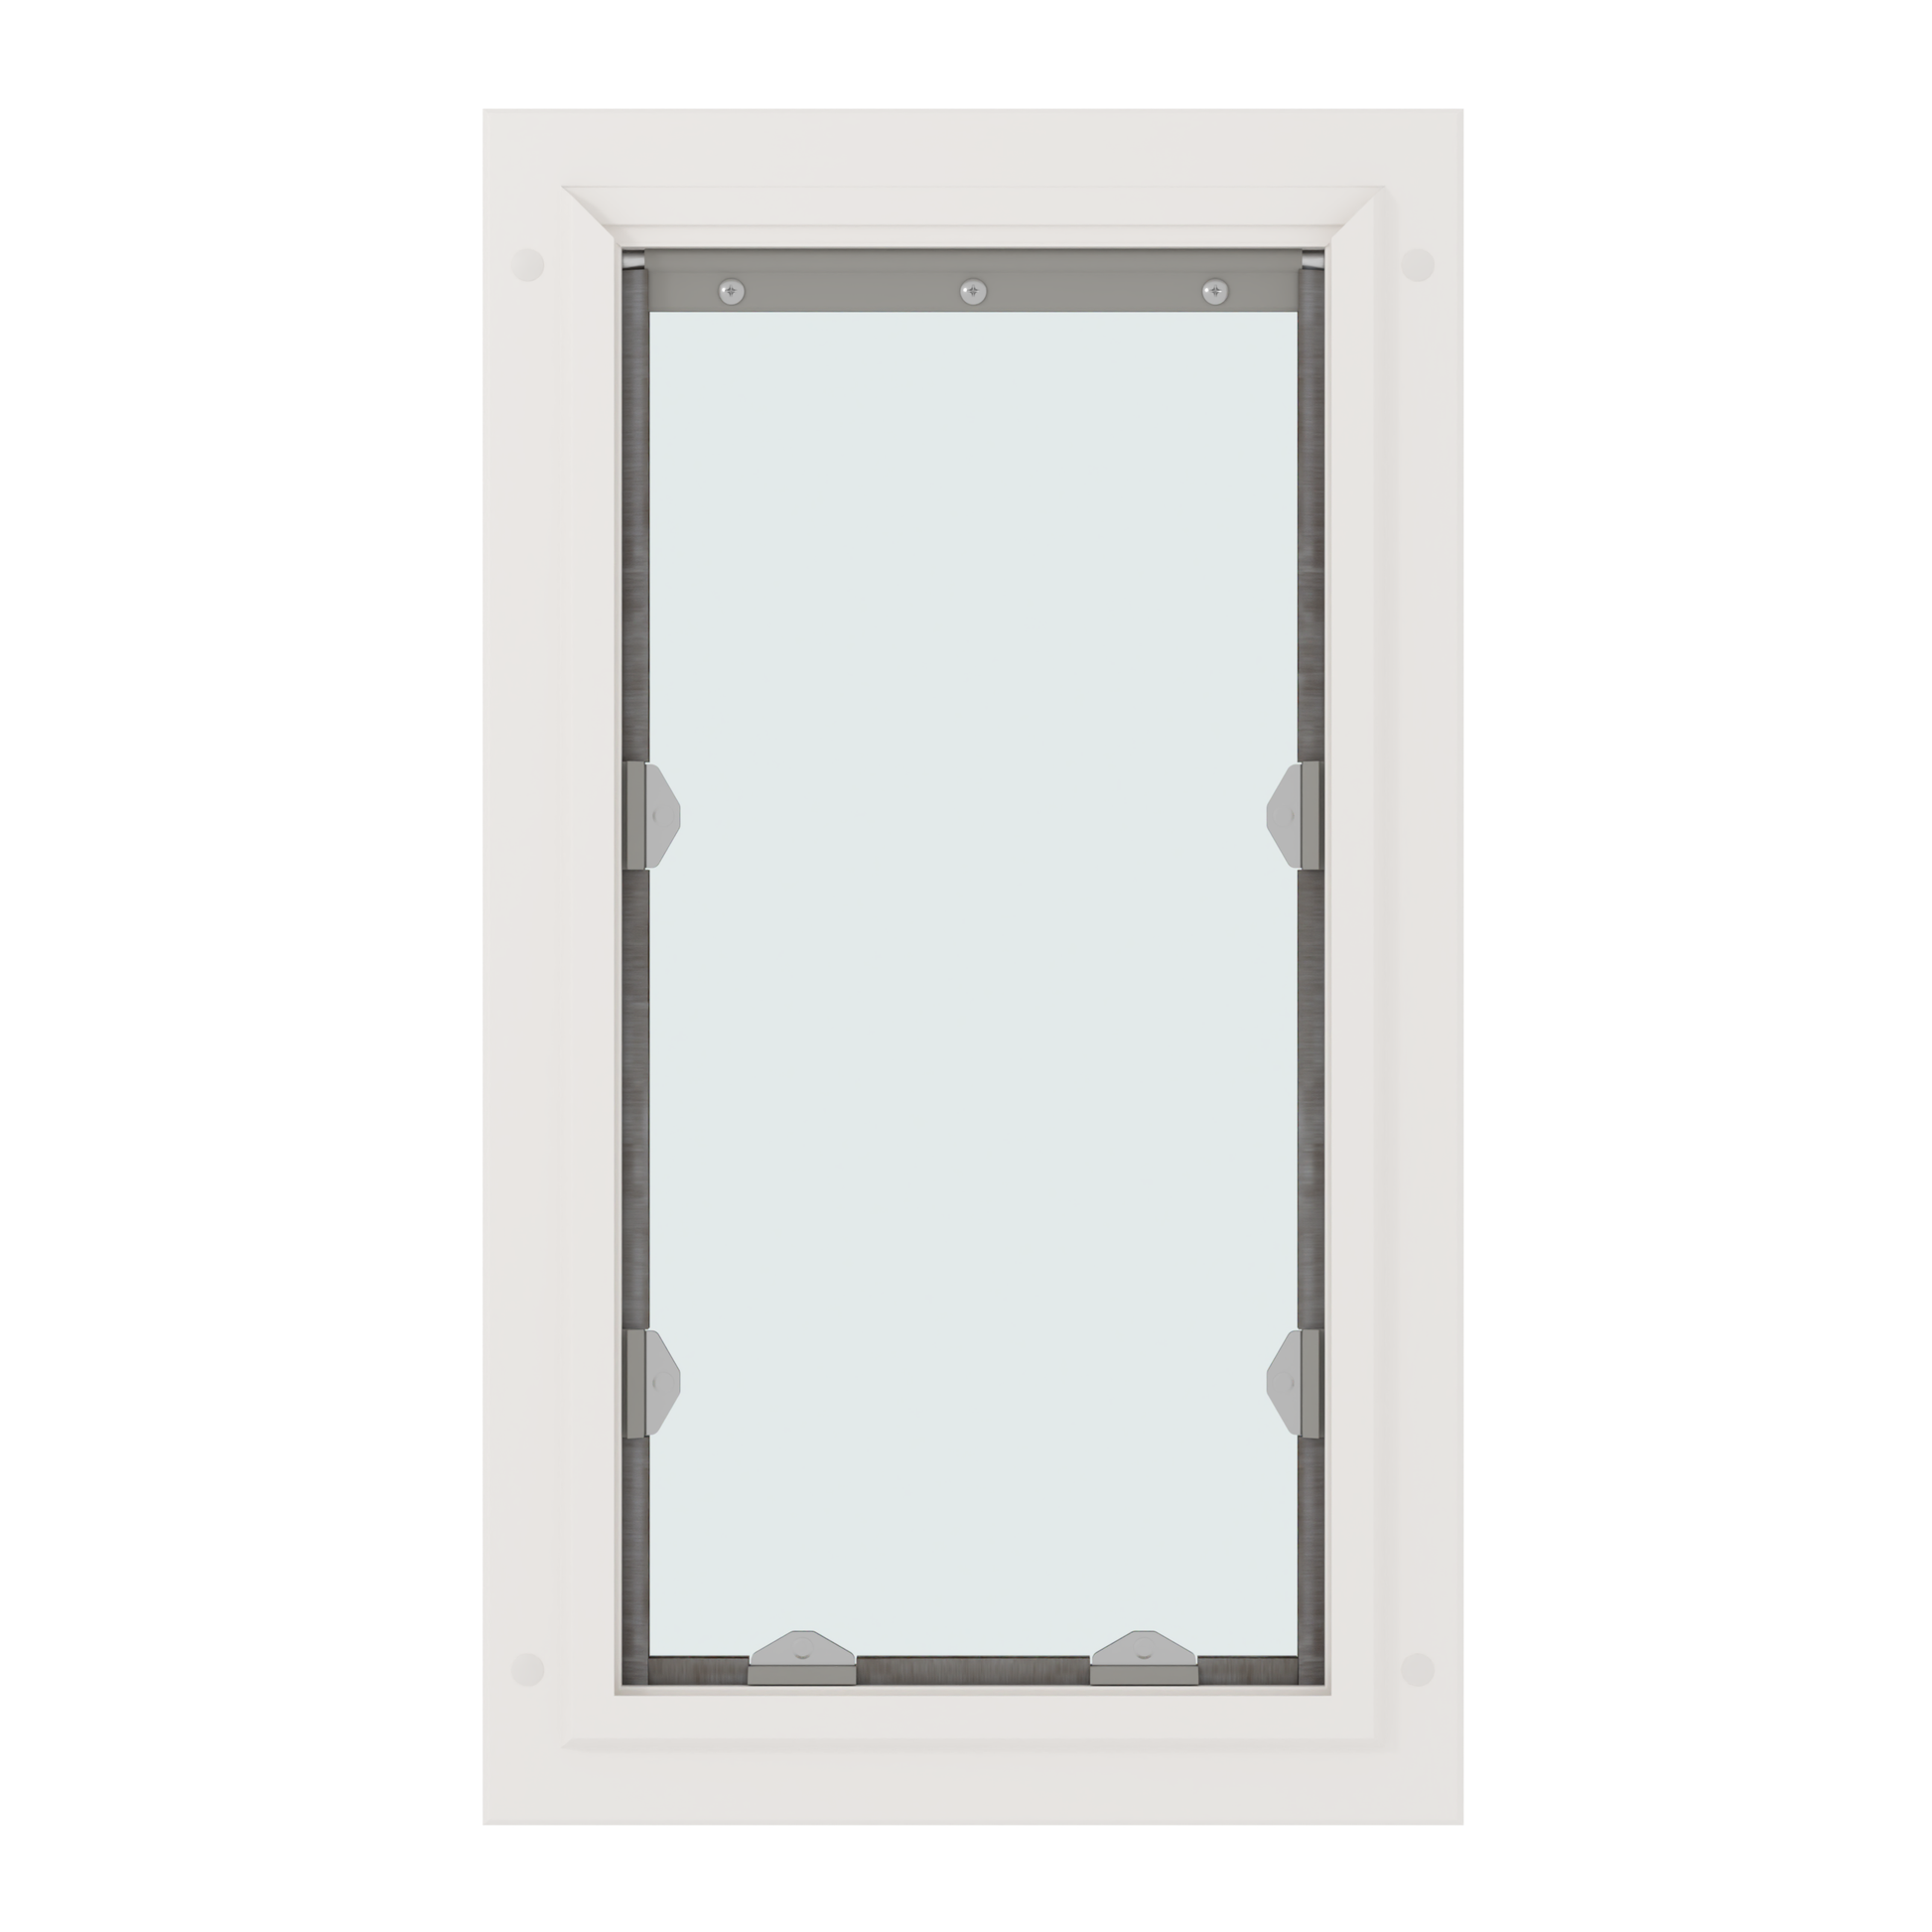
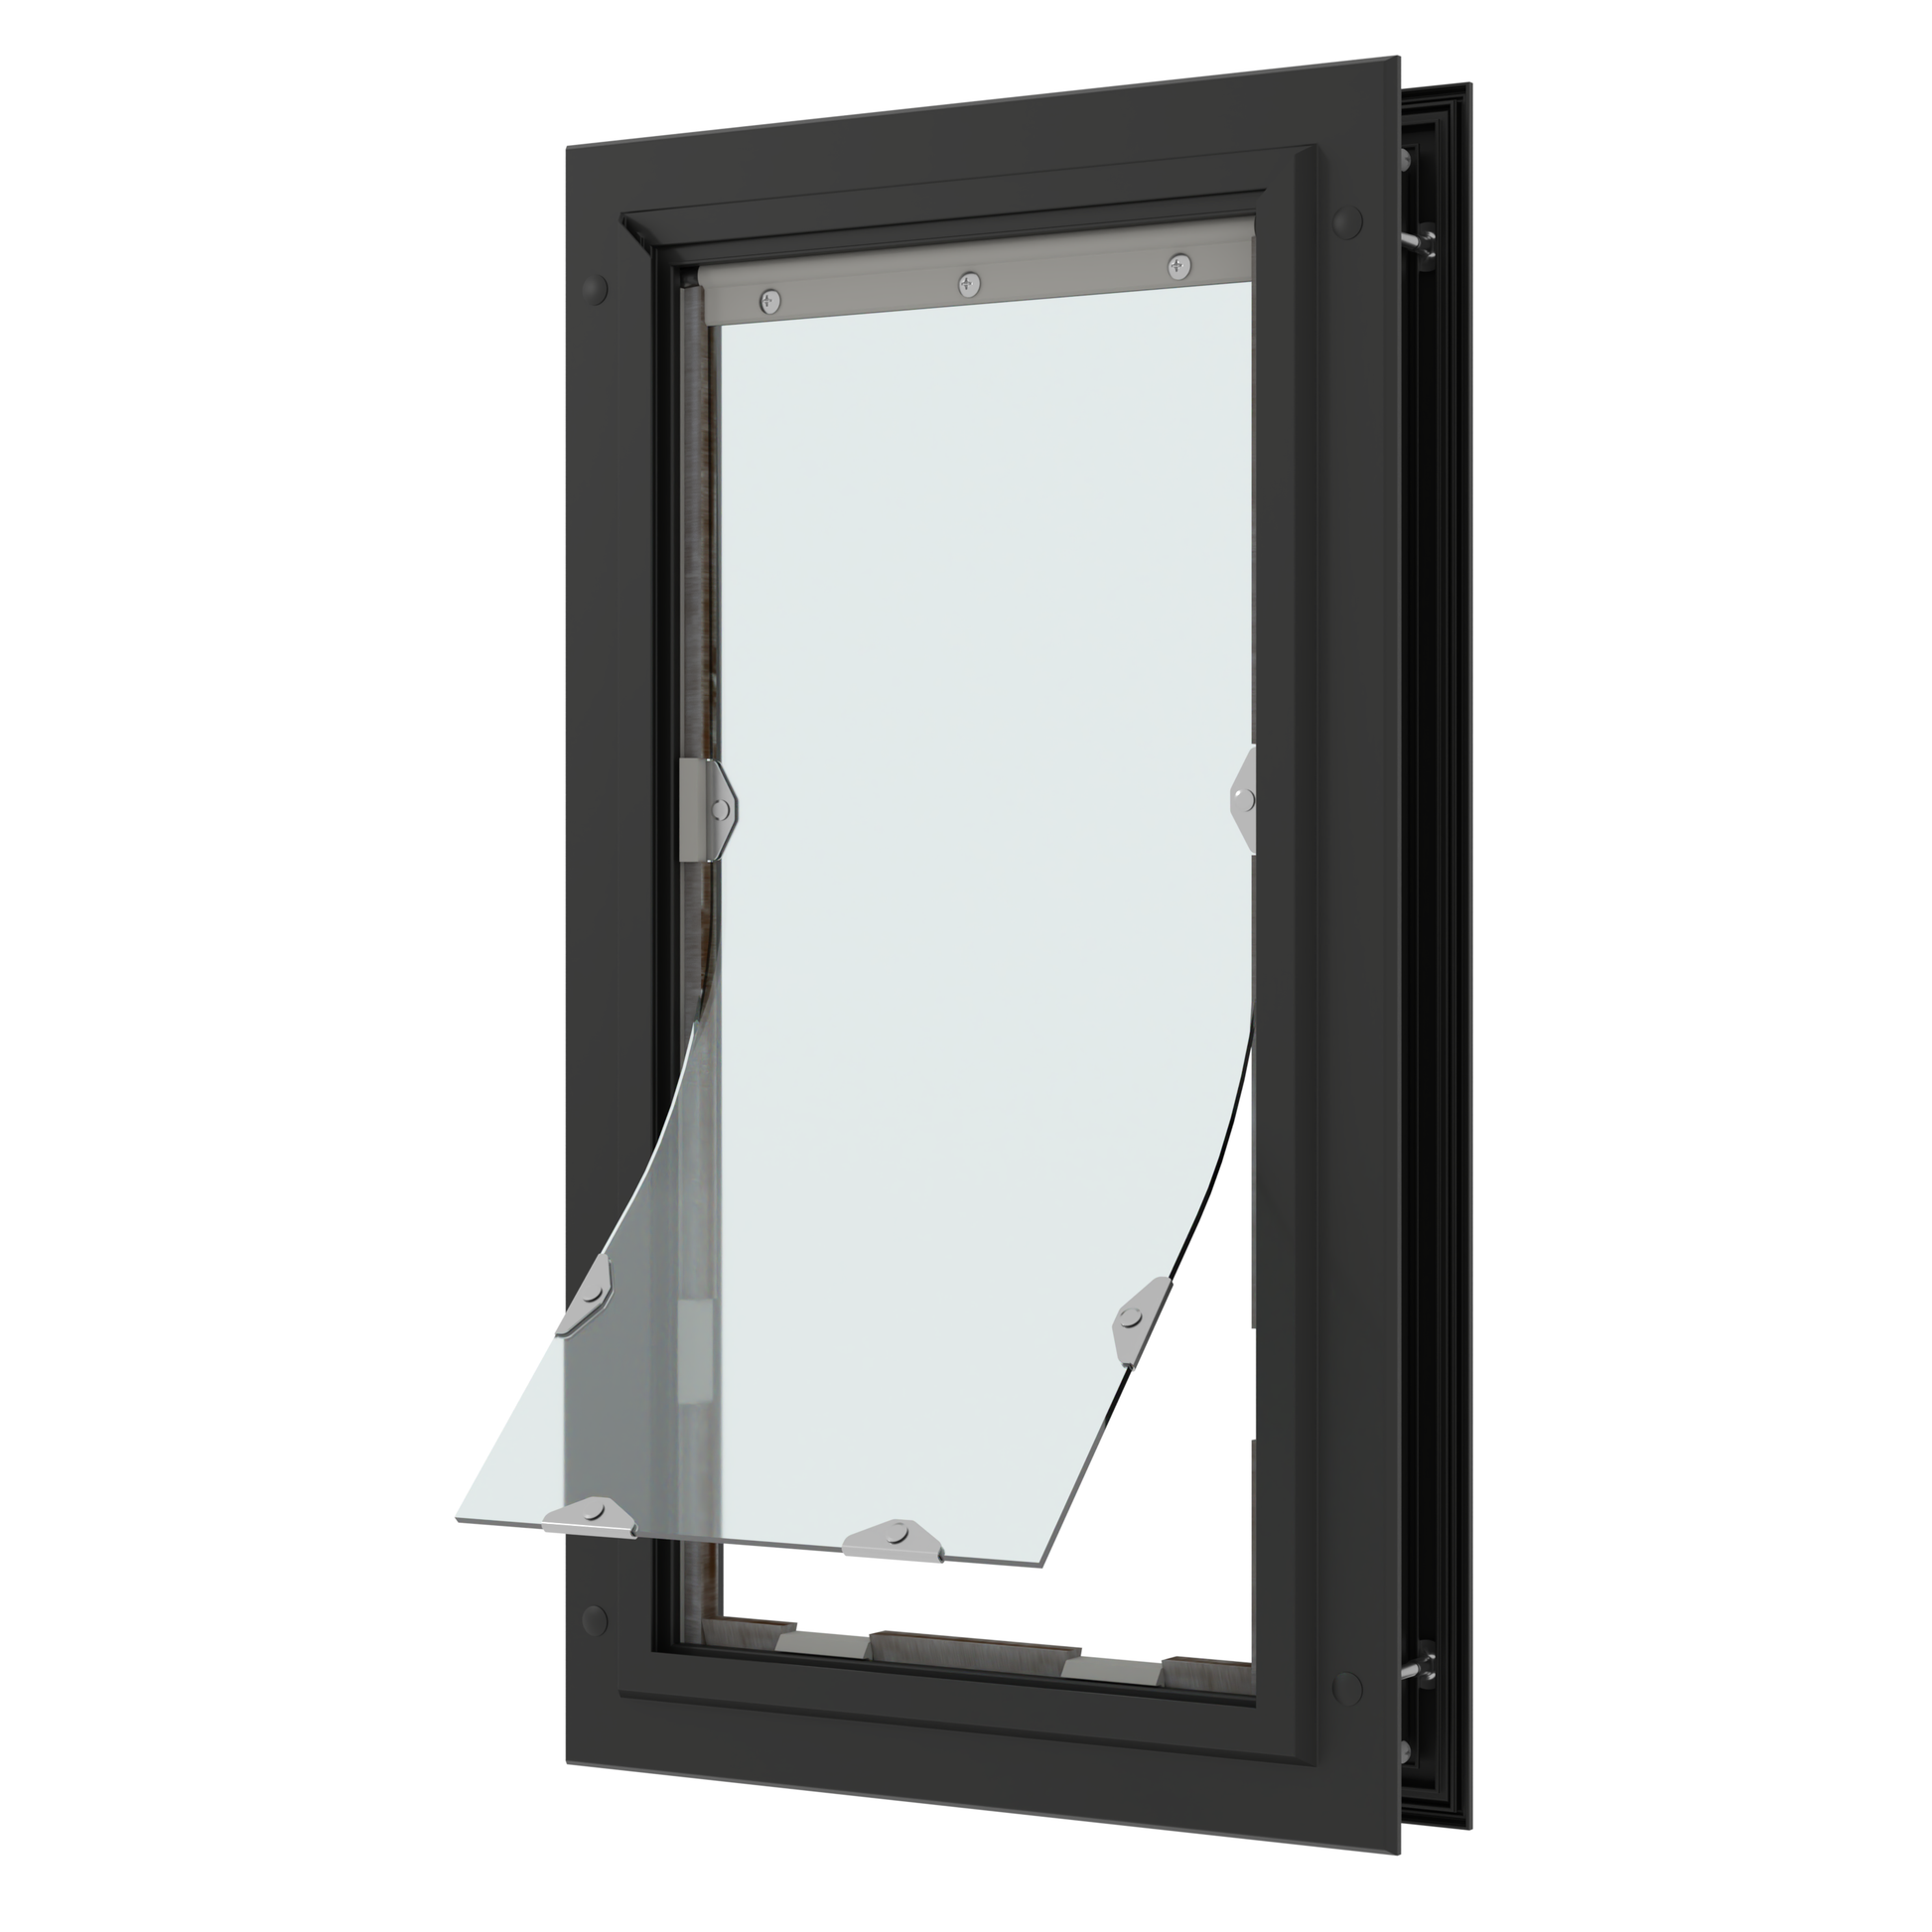
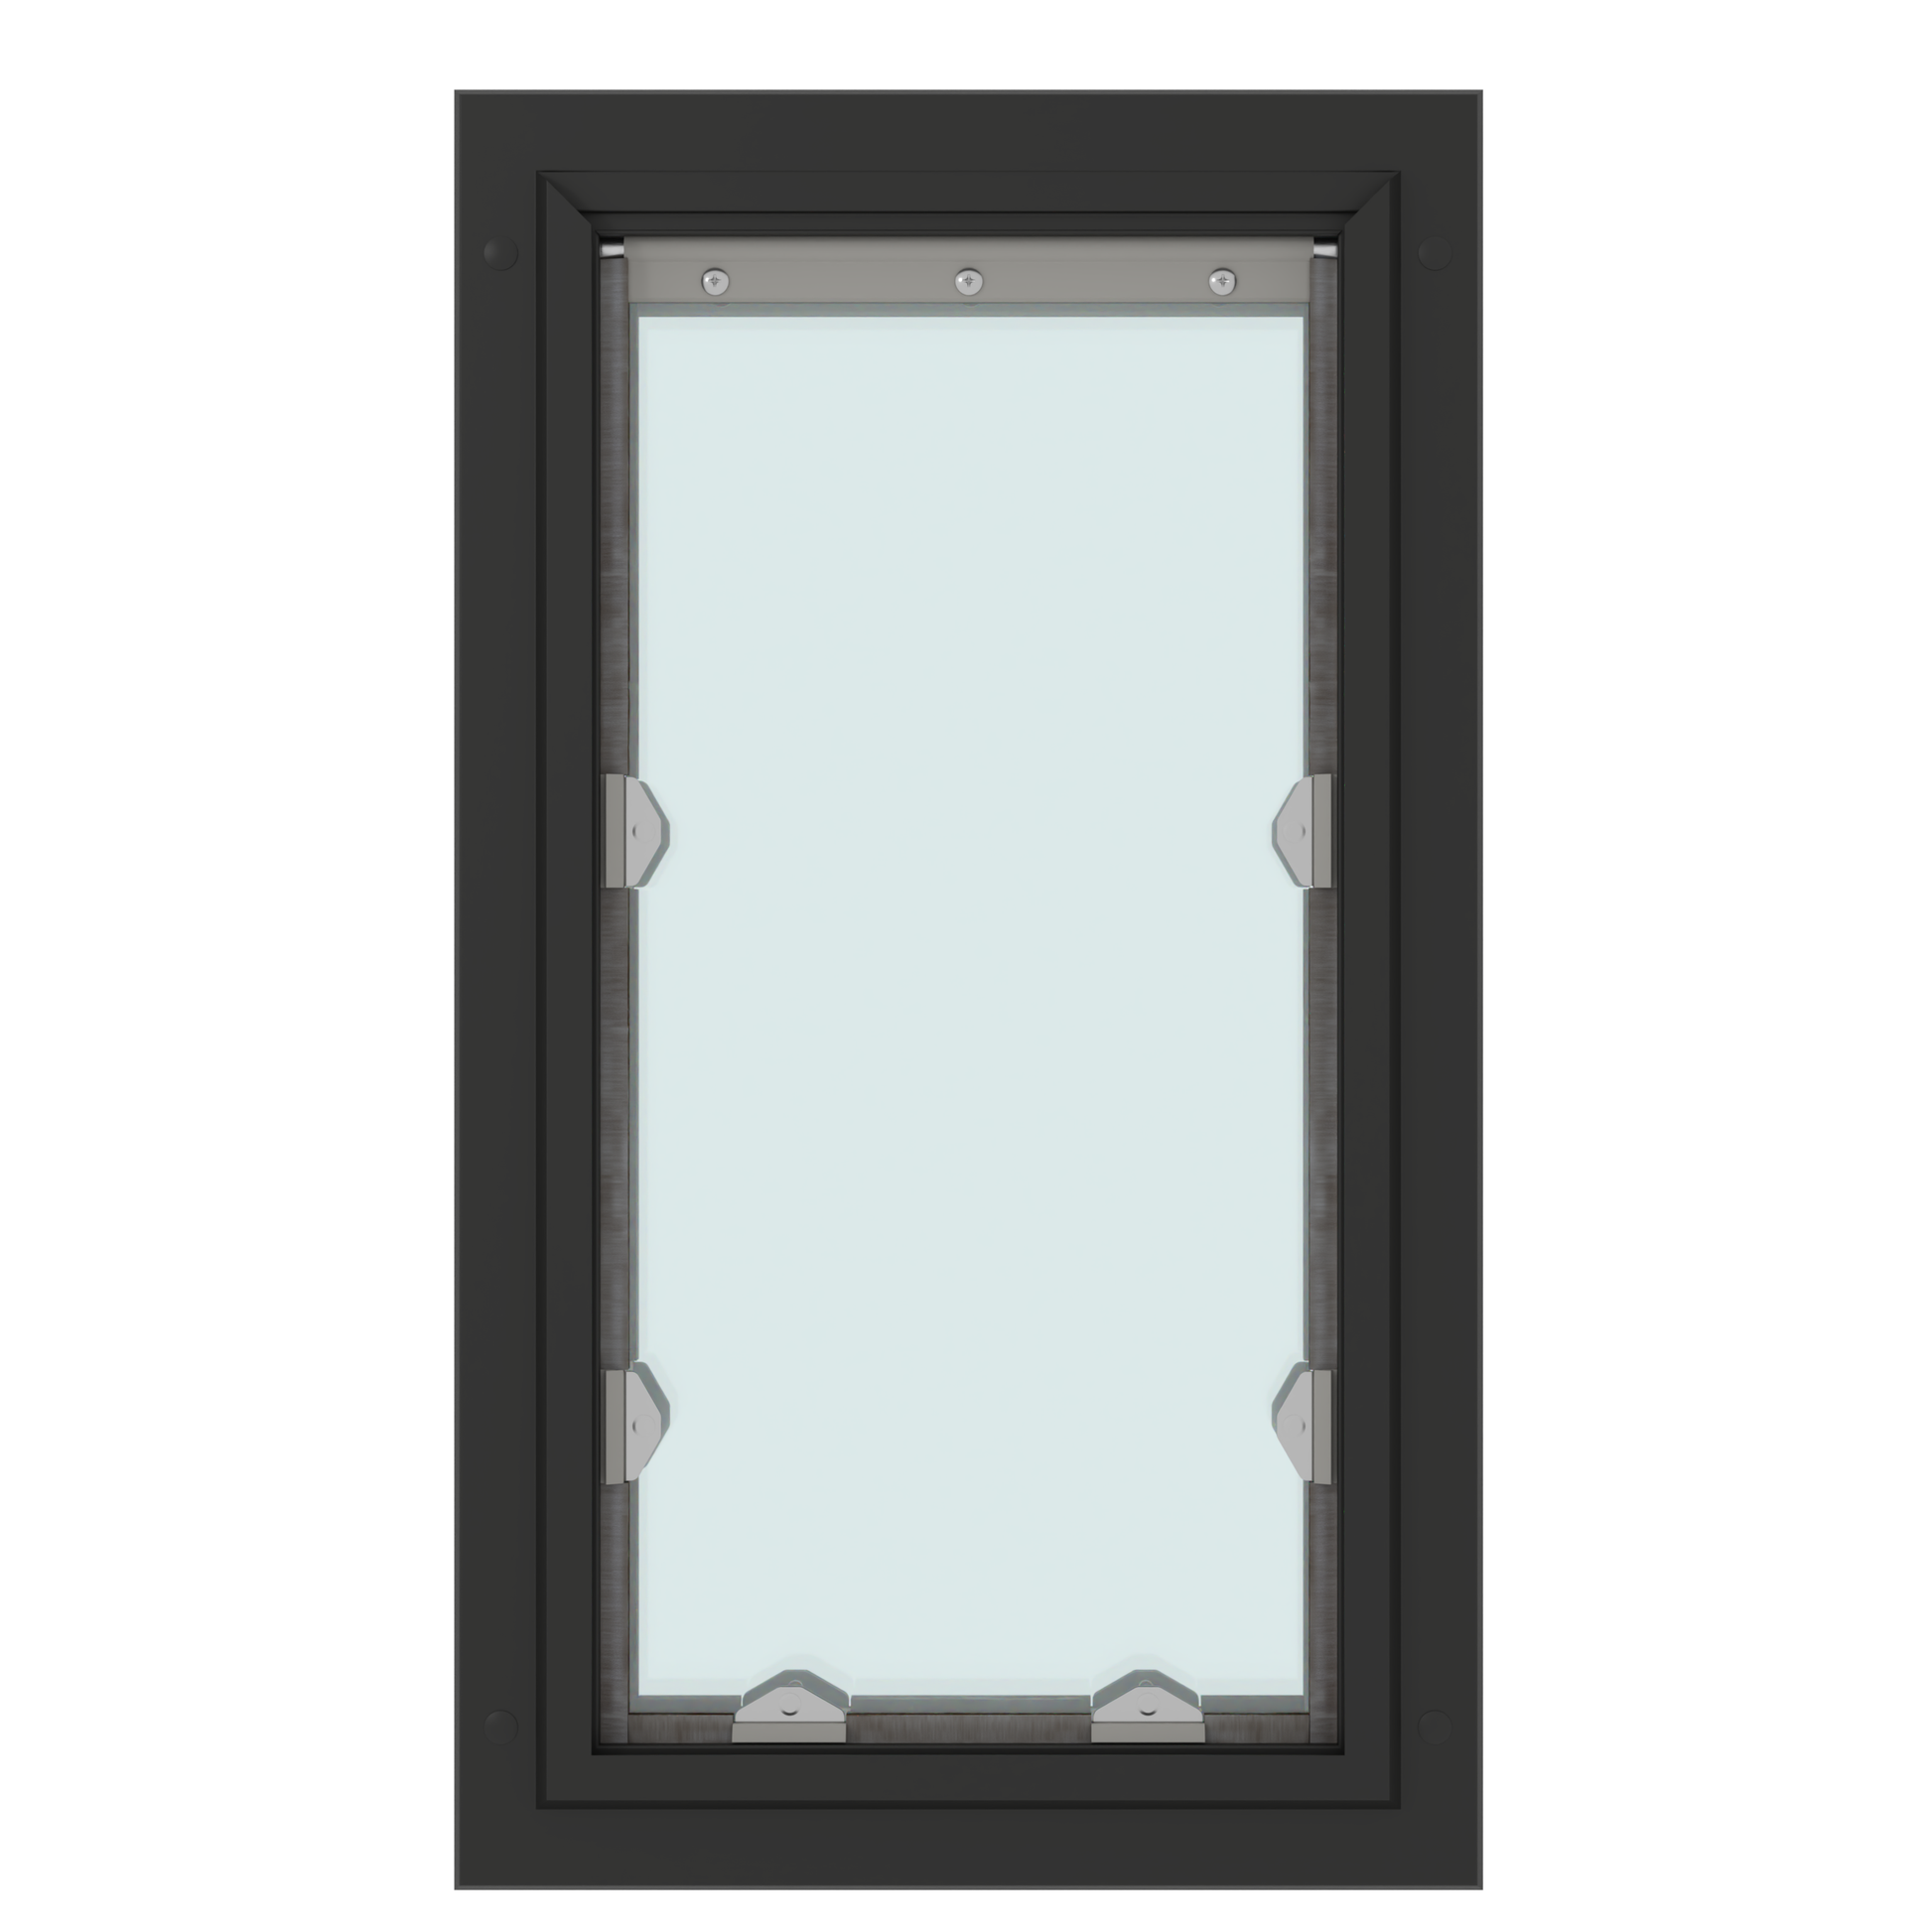
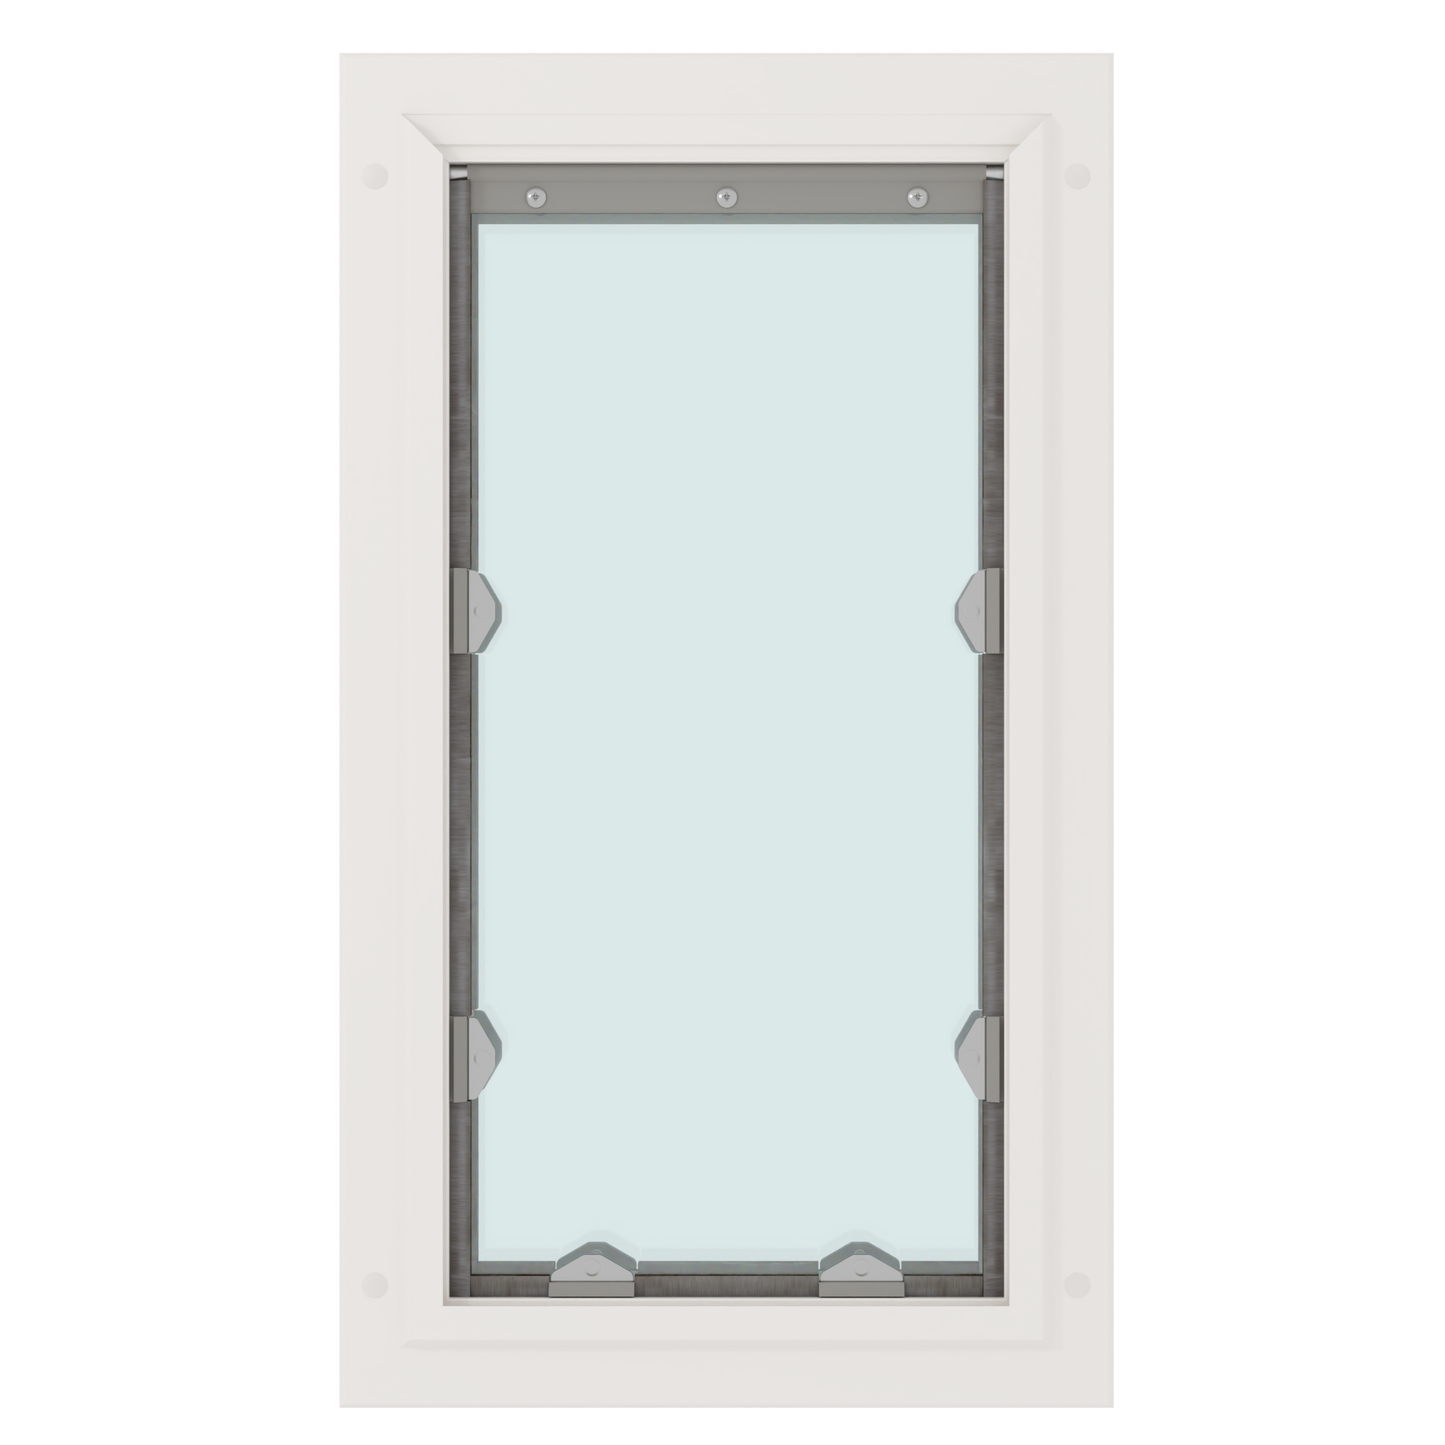
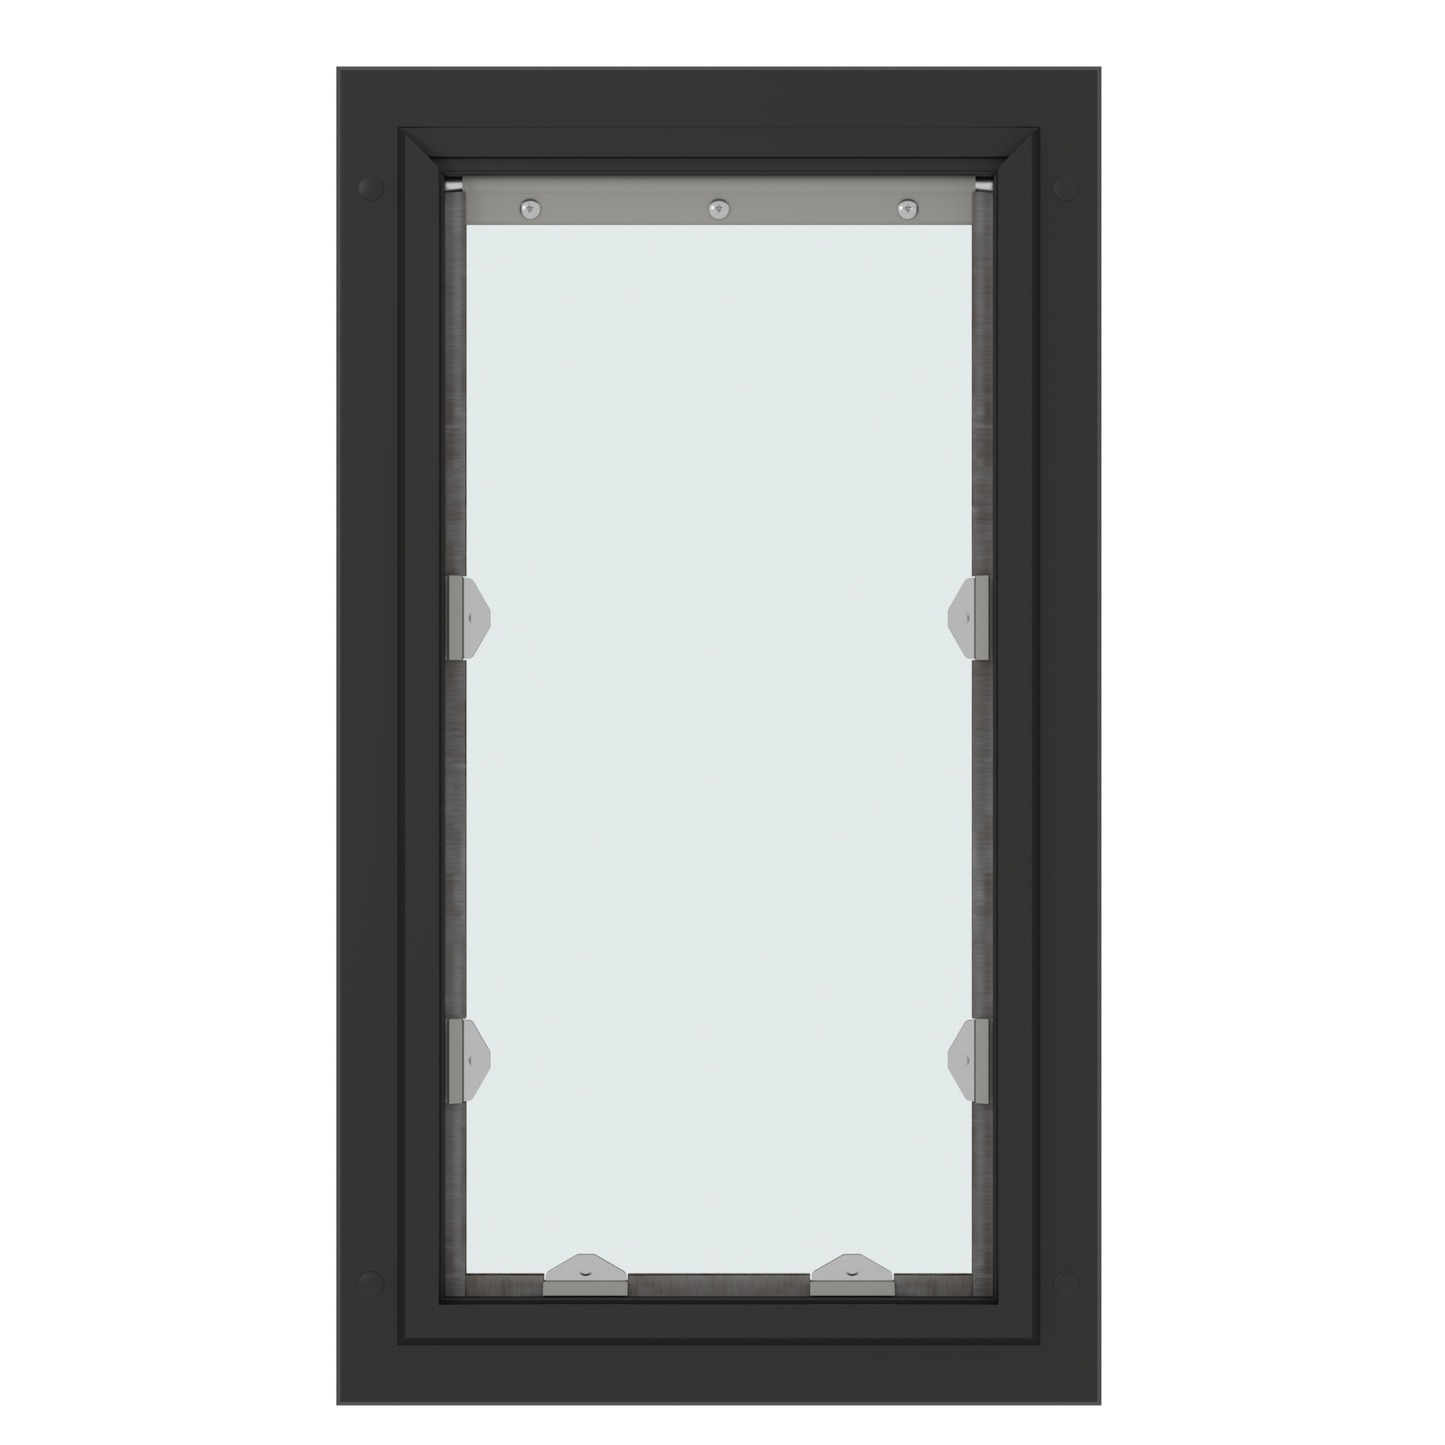
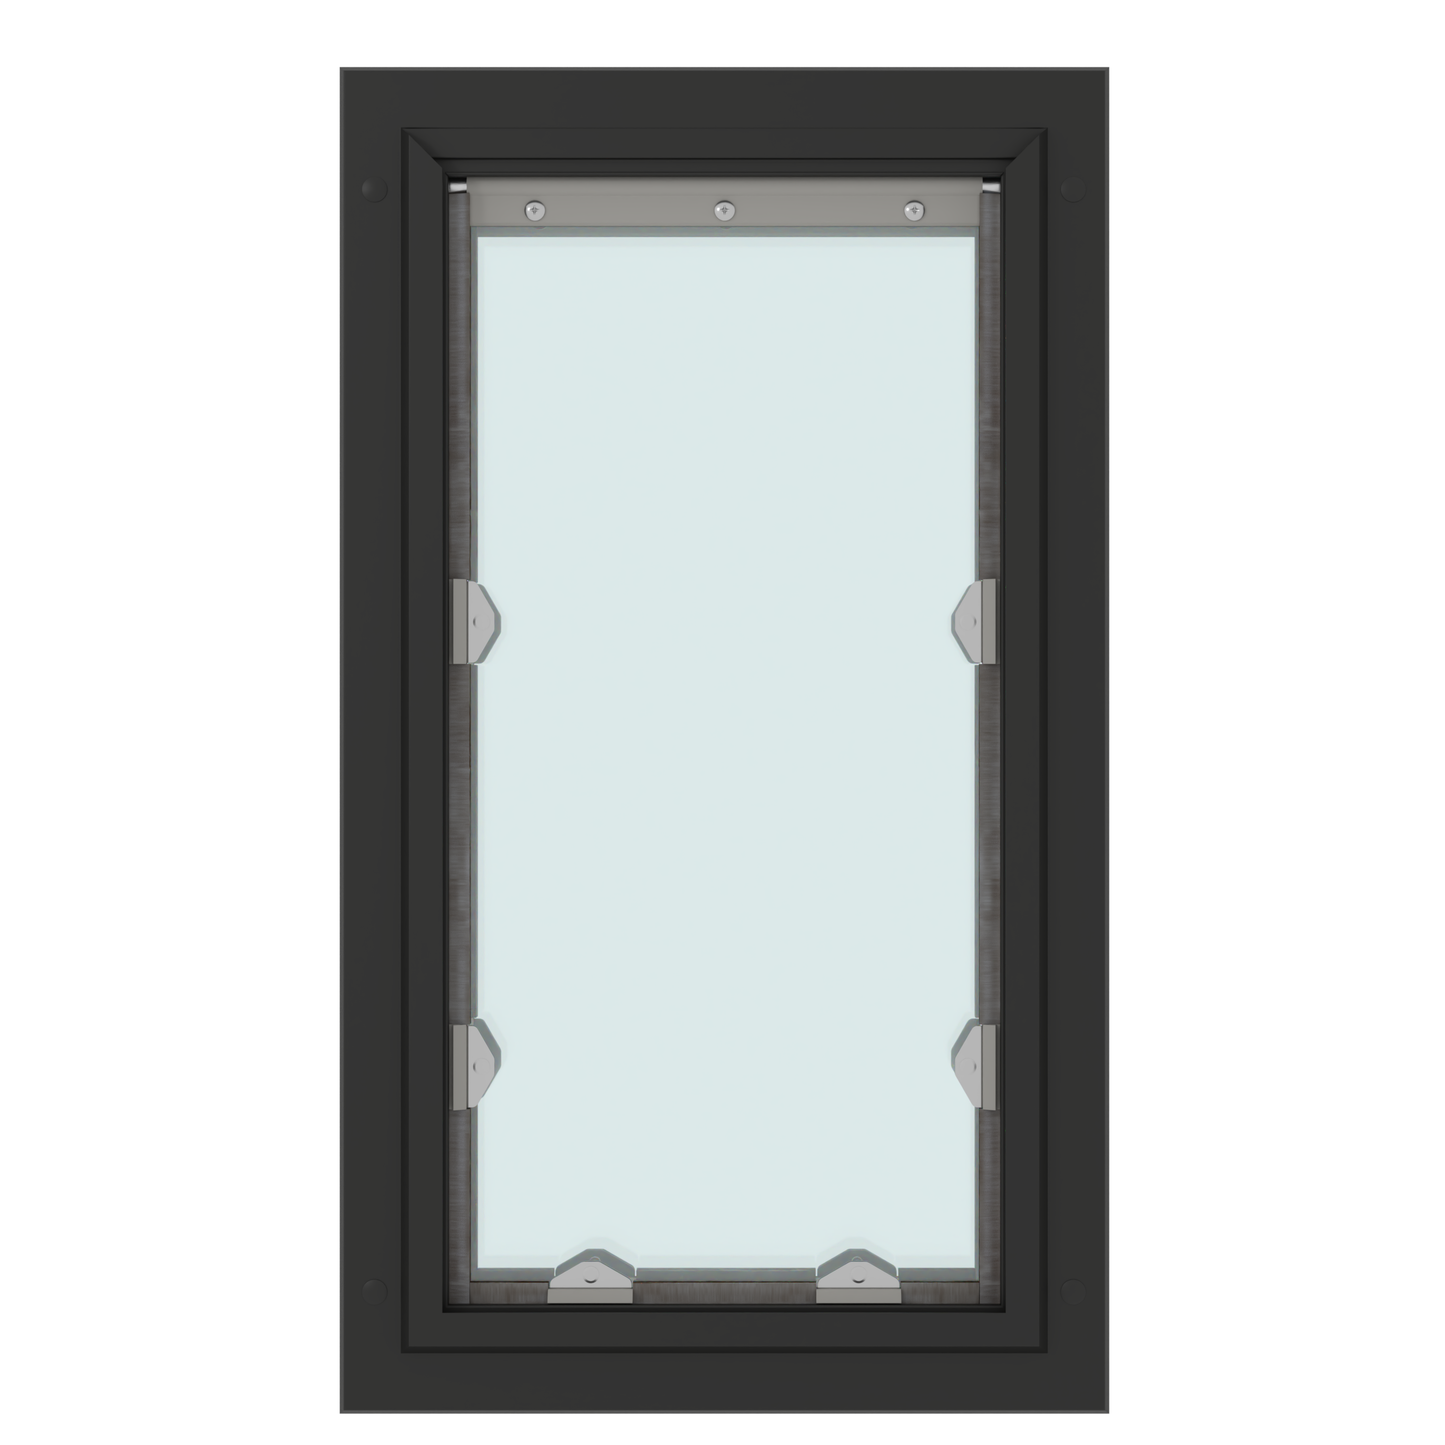
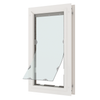
The Liberty Pet Door for Doors is a permanent in-door pet door for dogs. It installs directly through the door, with frames on both sides and the flap hanging in the cutout. Single-flap configuration only on this model.
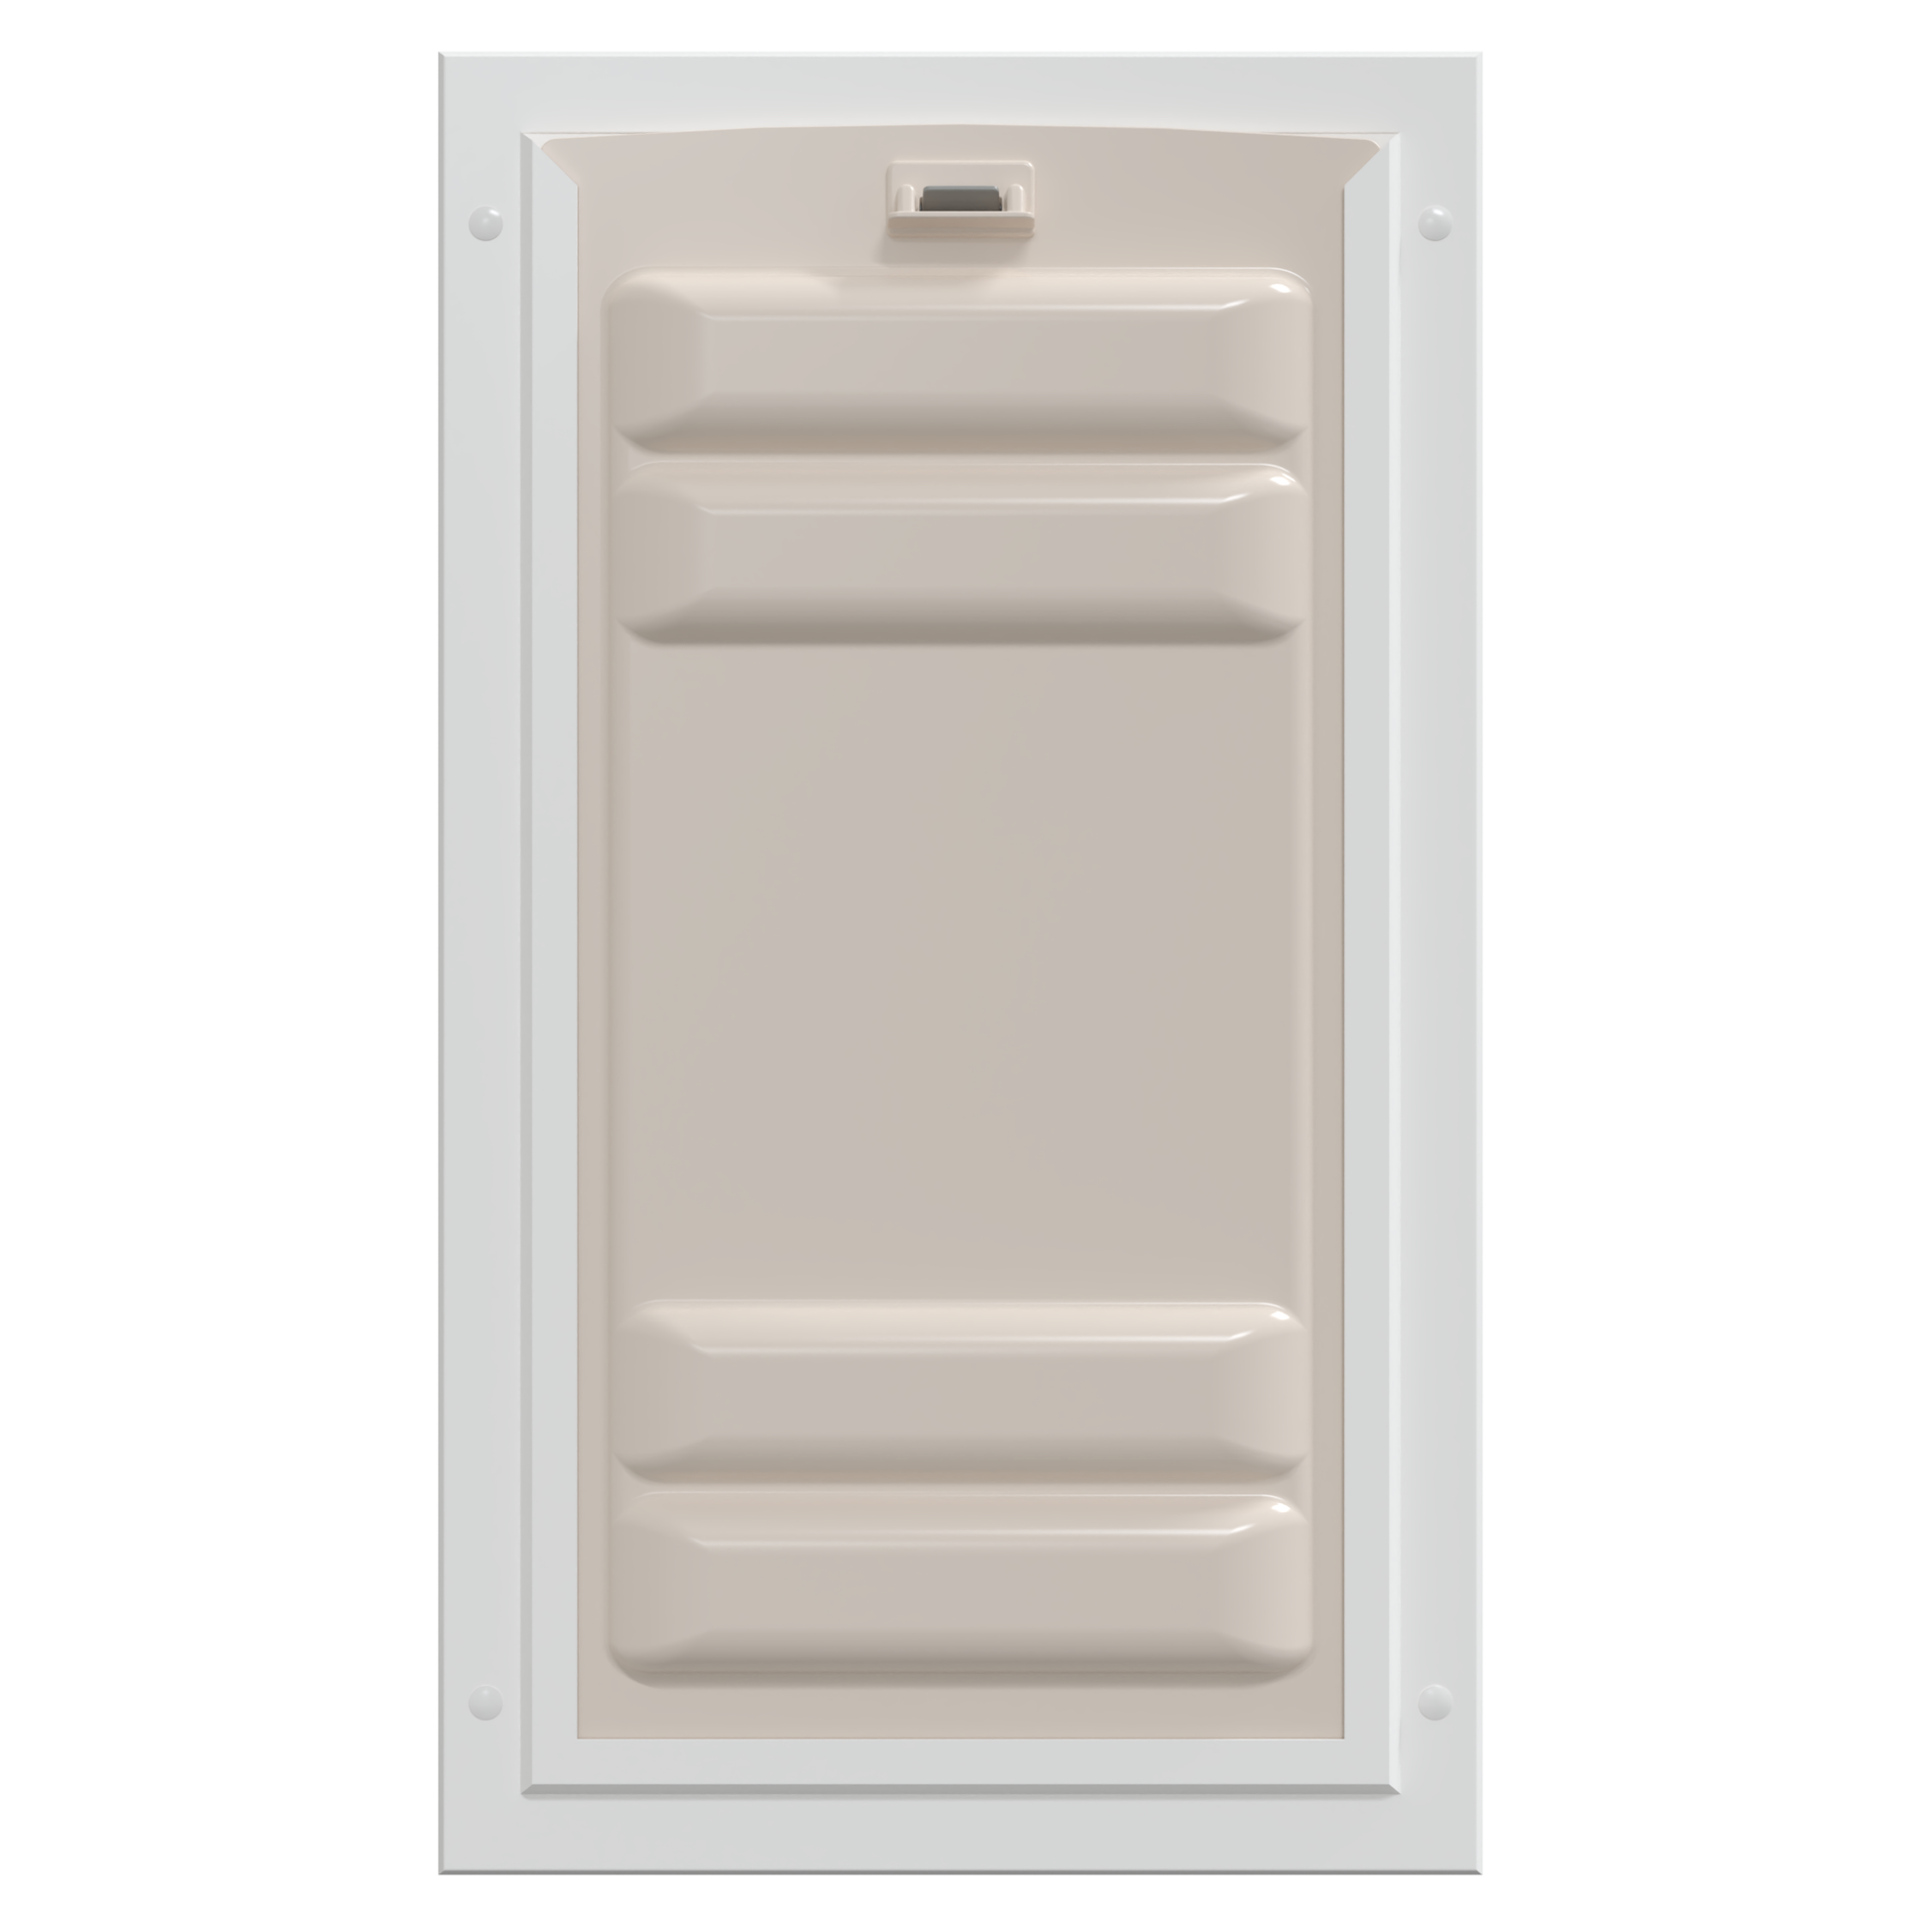
The aluminum frame and clear vinyl flap are rated from 0°F to 115°F. Perimeter weatherstripping creates the seal. Five sizes (small, medium, large, XL, XXL) cover dogs from terriers up through large breeds. Both white and black are stocked. A locking cover is included for nights, vacations, or trips to the vet.
Before ordering, pick size by your largest pet's shoulder width and chest height rather than current weight. Confirm the door has clearance above and below the planned cutout for the frame to seat flat. If you need a flap dimension outside the standard sizes, the custom-dimension version covers a wider range of widths and heights.
Made in the USA and backed by a 3-year warranty. Install is a moderate DIY job that requires cutting a rectangular opening through the door.
 Size Chart
| Flap Size | Flap Dimension | Rough Cut Out | Outside Frame Dimension | Recommended Pet Height |
|---|---|---|---|---|
| Small | 6" w x 12" h | 9-1/4" w x 15-1/8" h | 10 1/8" w x 16 3/4" h | 9" - 17" |
| Medium | 8" w x 16" h | 11-5/16" w x 19-3/16" h | 12 1/8" w x 20 13/16" h | 9" - 23" |
| Large | 10" w x 20" h | 13-3/8" w x 23-3/16" h | 14 3/16" w x 24 13/16" h | 9" - 29" |
| XL | 12" w x 24" h | 15-1/2" w x 27-3/16" h | 16 1/4" w x 28 7/8" h | 9" - 37" |
| XXL | 14" w x 28" h | 17-1/2" w x 31-1/4" h | 18-1/4" w x 32-7/8" h | 9" - 42" |
Find The Best Pet Door Size For My Pet

A
Pet Height: inches
B
Pet Width: inches
 Additional Information
 Installation Instructions
Single Flap Door Mount Instructions
 Difficulty
High
Difficulty
High
 Steps
14
Steps
14
 Time Required
2-3 hours
Time Required
2-3 hours
 Sections
06
Sections
06
 Flags
03
Flags
03
Parts
- 1 Installation Template
- Short Screws (2")
- Long Screws (2-1/4")
- 4 Screw Covers
- 1 Installation Magnet
- 1 Flap Frame
- 1 Trim Frame
- 1 Tube of Silicone
- 1 Locking Cover
Tools
- Pencil
- Drill with 3/8" (9,5 mm) drill bit
- Level
- Measuring Tape
- Jigsaw or Reciprocating Saw
Please read instructions & notes thoroughly before installation.
Single Flap Door Mount
Step 1 Prep Your Door

- If possible, remove the door from its hinges using a screwdriver and hammer to tap out the hinge pins. Lay the door flap for installation. Tape the provided template to the door. The top edge of the cut-out line should be at least 3” (7,6 cm) above the pet's shoulders.
Step 2 Drill the Holes

- Once you are certain the pet door will work with your door, make sure the template is level, and mark the outline with a pencil. Remove the template and drill holes through the corners just inside of the lines using a ⅜” (9,5 mm) drill bit.
Step 3 Saw An Opening

- Using a jigsaw, cut along the marked lines, making sure to cut straight.
Step 4 Check Weatherstripping

- Ensure the weatherstripping is firmly pressed in the groove on both frames. Weatherstripping indicated in red.
Step 5 Position the Frames

- Place the trim frame on the outside of the door and the flap frame on the inside.
Step 6 Position Screws


- Select appropriate screws and insert them into the pet door from the inside.
| Door Width | Screw Length |
|---|---|
| 1-⅜” (3.5 cm) | Short Screws (1-¾”) |
| 1-¾” (4.4 cm) | Long Screws (2-¼”) |
Step 7 Screw Door Into Place

- Once the pet door is leveled, tighten the screws so that the weatherstripping compresses.
Step 8 Attach Screw Covers

- Push the four screw covers in by hand to cover the screws.
- If you need help, you can use the wooden end of a hammer rubber, or other non-metal tool to tap in the hole plugs. You can also place a wood block on the hole plug and tap the block with a hammer.
Step 9 Seal With Silicone

- Apply silicone where the two frames meet. Also apply silicone where the outside frame meets the door.
PANELED DOORS
The best way to install the pet door is to have it straddle the recessed area of one of the panels. Have the pet door sit on the flat area in the middle, side, and below the recessed panel. The frame will cross the recessed area on the top, so you will be left with a gap. The easiest way to fill this gap is to get battens or shims from a local hardware store, and cut them to fit.
When that gap is mostly filled, caulk the remaining areas to seal the doggy door to the surface of the people door. If the space is very irregular you can also use a squishy foam weather stripping, which will compress down for a tight fit. When finished, use caulking to seal the door.
 FAQ
FAQ
FAQ
|
What is the difference between the single flap and double flap models? The single flap model is ideal for moderate climates. It features one flap for easy pet access and basic weather protection. The double flap model offers superior insulation with two flaps, making it perfect for areas with extreme temperatures or drafts. |
|
How can I clean the flap of the Liberty Pet Door? For effortless cleaning, use warm water, mild dish soap, and a soft cloth. Avoid harsh chemicals that can damage the vinyl flap. |
|
Can the Liberty Pet Door be installed in doors thicker than 1-3/4 inches? If your door is thicker than 1-3/4 inches, we recommend installing the wall model instead. This model is designed for secure installation in walls for wider access. |
|
Is professional installation required for the Liberty Pet Door? No prior experience is necessary for installation, but basic handyman skills are helpful. Our list of independent pet door installers can assist you if you prefer professional help. |
|
Are there any special tools required for the Liberty Pet Door installation? You'll need a drill, a reciprocating saw, or a jigsaw to complete the installation process. |
|
What is the warranty period for the Liberty Pet Door, and what does it cover? The Liberty Pet Door comes with a 3-year warranty that covers manufacturing defects. Damage caused by improper installation or pet chews is not included. |
|
How does the clear flap design make it easy for timid pets to use? The clear flap allows pets to see through the opening, reducing anxiety for pets hesitant to enter unfamiliar spaces. |
|
What is the recommended height for installing the Liberty Pet Door? We recommend installing the pet door at least 3 inches off the ground to maintain the structural integrity of your door. |
|
How does the Liberty Pet Door handle weather changes? The flap is designed to adapt to weather fluctuations, minimizing warping and long-term damage. Additionally, magnets and weatherstripping line the flap to keep out drafts. |
|
Can the Liberty Pet Door be installed on paneled doors? Absolutely! You may need to reinforce the surface with additional wood or install the door within one of the panels. |
|
Does the Liberty Pet Door come with an installation guide? Absolutely! Each Liberty Pet Door includes a QR code that provides access to detailed installation instructions. |
|
How does the Liberty Pet Door enhance pet independence? A pet door empowers your pet with greater independence. They can access the outdoors for bathroom breaks and exploration whenever they need. This can also help alleviate boredom and anxiety caused by separation. |
|
Are the installation materials included with the Liberty Pet Door purchase? Yes! All the components listed in the installation guide come included with your purchase. |
|
How long does it typically take to install the Liberty Pet Door? Installation typically takes a maximum of two hours, depending on your experience and the type of door you have. |
|
Can the Liberty Pet Door be installed in rental properties? If you plan on using the pet door only part-time in a rental property you own, we recommend adding the Watchdog security door for additional security. Otherwise, you might consider a temporary dog door panel insert to avoid permanent alterations. |
|
How does the Liberty Pet Door impact home security? While some pet door owners worry about burglaries, there's no evidence linking pet doors to increased break-ins. In fact, owning a pet is likely more effective in deterring potential thieves. |
|
What should I do if I encounter difficulties during the Liberty Pet Door installation? Our customer service team is happy to assist you with any difficulties you encounter during installation. Feel free to reach out for expert help. |
|
Are there any customization options for the Liberty Pet Door? You can customize your Liberty Pet Door beyond size and color by choosing specific pet flap dimensions. This allows you to order a pet door that perfectly fits an existing hole in your wall. |
|
How does the Liberty Pet Door compare to other pet doors on the market in terms of durability and functionality? The Liberty Pet Door is built to last, with superior durability that surpasses cheaper plastic alternatives. It provides exceptional functionality and will outperform most other pet doors on the market. |
 Warranty
Warranty
Warranty Type: Limited.
Duration: 3 years
Coverage: Defects in materials and workmanship under standard regular use.
Exclusions:
Damage caused by misuse or not using the product as intended.
Improper installation.
Damage caused by chewing.